Introduction
There’s something so special about the way a simple dessert can become a family favorite. For us, it’s this Burnt Honey Pie. It wasn’t an instant hit, though! I remember the first time I tried to make it; the honey burned a little too much, and the crust was… well, let’s just say it wasn’t my finest hour in the kitchen.
But my family? They saw potential. They loved the smoky, caramelized flavor of the honey and encouraged me to keep trying. That’s how this *burnt honey custard pie* became more than just a recipe; it became a symbol of our family’s love for trying new things, even when they don’t go perfectly the first time.
This pie creates a unique connection around our table through its comforting, authentic flavors. The warmth of the honey, the subtle smokiness, and the creamy custard filling—it all comes together in a way that feels both familiar and new.
My journey with this pie has been one of learning, experimenting, and ultimately, creating something truly special for my loved ones. I am constantly finding new ways to put my spin on this classic dessert.
I’m excited to share this recipe with you. It’s perfect for fellow home cooks who appreciate genuine, flavorful meals. Whether you’re a seasoned baker or just starting, this aromatic *Burnt Honey Pie* is a great way to bring a little warmth and sweetness to your family’s table.
And don’t worry if it’s not perfect the first time, like my first try. The most important ingredient is love, and a willingness to learn.
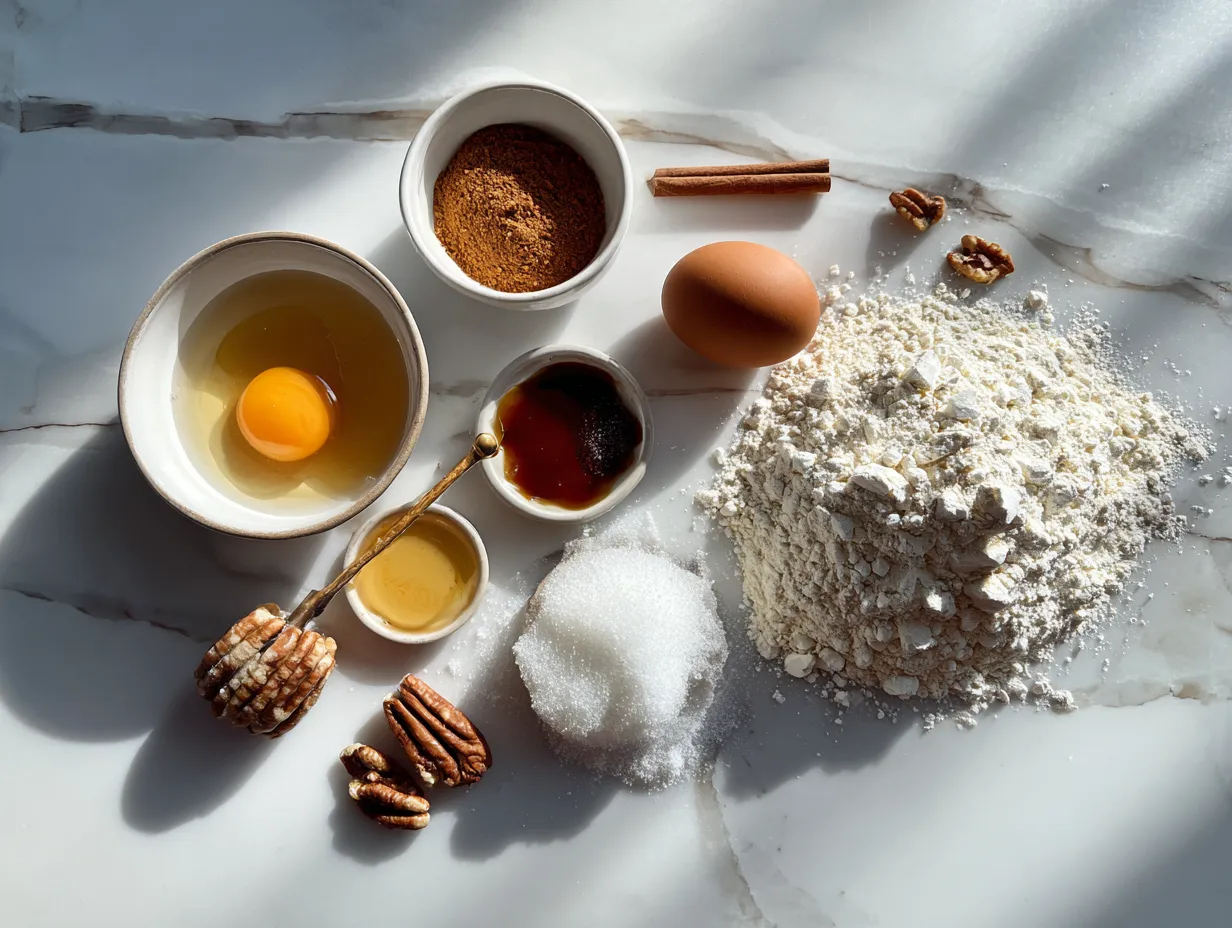
Ingredients You’ll Need
Here’s what you’ll need to create this comforting Burnt Honey Pie. Trust me, this ingredient list focuses on quality over quantity for the most authentic flavors!
- **1 1/2 cups heavy cream:** For the richest, creamiest filling.
- **1/2 cup whole milk:** Adds a touch of lightness to balance the richness.
- **6 large egg yolks:** These are the key to a silky, decadent custard.
- **1/2 cup burnt honey:** The star of the show!
- **1/4 teaspoon sea salt:** Enhances the sweetness and adds depth of flavor.
- **1 teaspoon vanilla extract:** A touch of warmth and aroma.
- **1 pre-made pie crust:** Feel free to use your favorite homemade crust or a high-quality store-bought one.
For the best flavor in your *Burnt Honey Pie*, I recommend sourcing your honey locally if possible. You’ll find the freshest ingredients for this Burnt Honey Pie at your local farmers market!
This recipe proves that authentic flavor comes from thoughtful ingredient choices, and don’t skimp on the vanilla! My family loves when I add a pinch of cinnamon to our *Smoked Honey Pie*.
Let’s Create This Together!
Let’s get started on our baked honey pie! Remember, cooking is a journey, not a race. Take your time, enjoy the process, and don’t be afraid to make mistakes.
- **Prepare the Honey:** In a saucepan, gently heat the honey over medium heat. Watch it closely as it darkens and begins to smoke lightly. This is where the magic happens!
- **Infuse the Cream:** In a separate saucepan, heat the heavy cream and milk until it’s just simmering. Remove from heat and let it steep for 10 minutes to infuse the cream with the honey’s smoky flavor. This step adds an incredible depth of flavor to this delightful dessert.
- **Whisk the Egg Yolks:** In a mixing bowl, whisk together the egg yolks, sugar, and salt until light and creamy. This ensures a smooth, even custard.
- **Temper the Eggs:** Slowly drizzle the warm cream mixture into the egg yolks, whisking constantly to prevent the eggs from curdling. This is a crucial step for a silky custard filling in your *Burnt Honey Pie*. Here’s where I used to miss a key step with my pie – learn from my experience!
- **Add Vanilla:** Stir in the vanilla extract. This will give it a lovely aroma.
- **Pour into Crust:** Pour the custard mixture into your prepared pie crust.
- **Bake:** Bake in a preheated oven at 325°F (160°C) for 30-40 minutes, or until the filling is set but still slightly wobbly in the center. Your *Burnt Honey Pie* should fill the kitchen with amazing aromas by now!
- **Cool and Chill:** Let the pie cool completely on a wire rack, then chill in the refrigerator for at least 2 hours before serving. This allows the flavors to meld and the custard to set properly. Perfect time to appreciate the aromatic transformation!
In my kitchen, this flavorful pie typically takes about an hour from start to finish, not including chilling time. While your dessert is developing these flavors, take a moment to appreciate creating something special for your family!
Don’t be surprised if your crust develops a slight crack on the surface; it’s perfectly normal and adds to its rustic charm.
How We Love to Enjoy This!
There are so many ways to savor this delicious *Burnt Honey Pie*! The family gathers quickly when this aromatic pie appears. We especially love it with a dollop of freshly whipped cream or a scoop of vanilla ice cream. The cool creaminess perfectly complements the warm, smoky sweetness of the pie.
For a truly indulgent experience, try pairing it with a glass of tawny port or a cup of strong black coffee. If your family loves these authentic flavors, they’ll appreciate how the rich, nutty notes of the port enhance the caramelized honey flavors.
This amazing pie is perfect for those evenings when we want something truly satisfying!
It’s become a staple for our holiday gatherings, potlucks, and even just a cozy Sunday afternoon treat. And, this burnt honey custard pie can be served warm or cold.
Sometimes, I like to get creative with the leftovers. A slice of Salted Honey Pie for Pi(e) Day! | All Roads Lead to the Kitchen crumbled over yogurt or granola makes a delicious breakfast parfait. You can even blend it into a milkshake for a decadent treat! This aromatic dessert is perfect for those evenings when we want something truly satisfying!
For a seasonal twist, try adding a sprinkle of cinnamon or nutmeg to the filling during the fall months, or topping it with fresh berries in the summer. This adaptation gives this smoked honey pie a festive touch!
I remember one Thanksgiving when I brought this Caramelized Honey Crème Brûlée | The Bake Dept to my sister’s house. Everyone raved about it, and it quickly became the star of the dessert table.
FAQs: Your Questions Answered
I know you might have some questions about making this pie, so here are some of the most common ones I get asked.
**Does this *Honey Pie* really satisfy hearty appetites?** Absolutely! The rich, creamy custard and the smoky-sweet honey create a filling and satisfying dessert that’s perfect for ending a hearty meal. The secret to really making this pie satisfy your family is a well-made crust.
**What if someone in my family prefers milder flavors in their *Burnt Honey Pie*?** No problem! You can adjust the intensity of the honey flavor by using a lighter honey or reducing the amount of time you “burn” it. You can also add a squeeze of lemon juice to the filling to brighten it up and balance the sweetness.
**How can I prepare this *Smoked Honey Pie* ahead for busy weeks?** This pie is a great make-ahead dessert. You can bake it a day or two in advance and store it in the refrigerator until you’re ready to serve it. The flavors actually meld and deepen over time, making it even more delicious!
**Can I use a different type of crust for this recipe?** Of course! While I love using a traditional pie crust, you can also use a graham cracker crust or a shortbread crust for a different flavor and texture. If you’re looking for a gluten-free option, try using an almond flour crust.
**What’s the best way to prevent the pie crust from burning while baking?** To prevent the crust from burning, you can cover the edges with foil or use a pie shield. You can also blind-bake the crust before adding the filling to ensure it’s fully cooked and doesn’t get soggy.
**Can I freeze this *Honey Pie*?** Yes, you can freeze this pie! Wrap it tightly in plastic wrap and then in foil, and it will keep in the freezer for up to a month. Let it thaw overnight in the refrigerator before serving.
**Why is my *Burnt Honey Pie* filling cracking?** A few reasons! Overbaking, baking at too high a temperature, or cooling too quickly can cause the filling to crack. Try reducing the oven temperature, baking for a shorter time, and letting the pie cool slowly on a wire rack.
Final Kitchen Wisdom
This family favorite isn’t just a dessert; it’s a way to bring warmth, comfort, and connection to your family’s table.
For more genuine cooking ideas for family meals, explore this Hot Honey Mozzarella Eggs recipe.
It’s a celebration of simple ingredients transformed into something extraordinary. And it supports my family’s authentic meal goals because it is delicious!
**My Burnt Honey Pie Flavor Secrets:**
- The secret to the perfect “burnt” honey is patience. Don’t rush the process, and watch it carefully to prevent it from burning too much.
- Tempering the eggs properly is key to a silky smooth custard. Slow and steady wins the race!
- Don’t be afraid to experiment with different spices and flavors to make it your own.
Some family-tested variations we love include:
- Adding a pinch of cinnamon or nutmeg for a warm, autumnal flavor.
- Topping it with fresh berries or a drizzle of chocolate for a touch of elegance.
- Serving it with a scoop of salted caramel ice cream for an extra decadent treat.
My son loves it with a sprinkle of sea salt on top, while my daughter prefers it with a dollop of whipped cream. I encourage you to make this *Burnt Honey Pie* your signature version by tweaking the ingredients and flavors to suit your family’s preferences.
Experience the Rich Flavors of Our Handcrafted Burnt Honey Pie, for a great alternative.
I hope this recipe inspires you to create many delicious memories with your loved ones. Remember, the most important ingredient in any recipe is love. Enjoy the process, and don’t be afraid to get a little messy!
So go ahead, fellow flavor seekers, and create this satisfying *Burnt Honey Pie*.
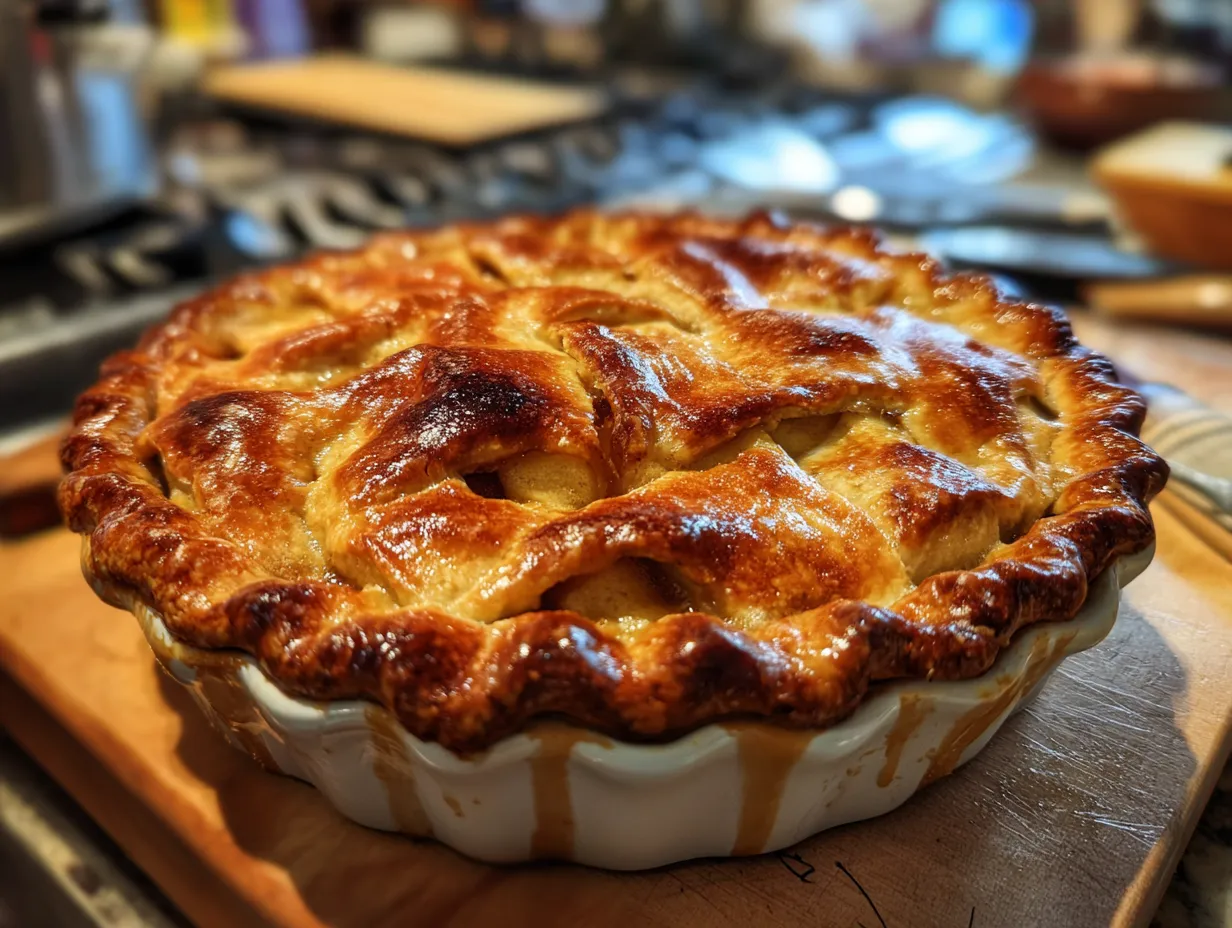
Burnt Honey Pie
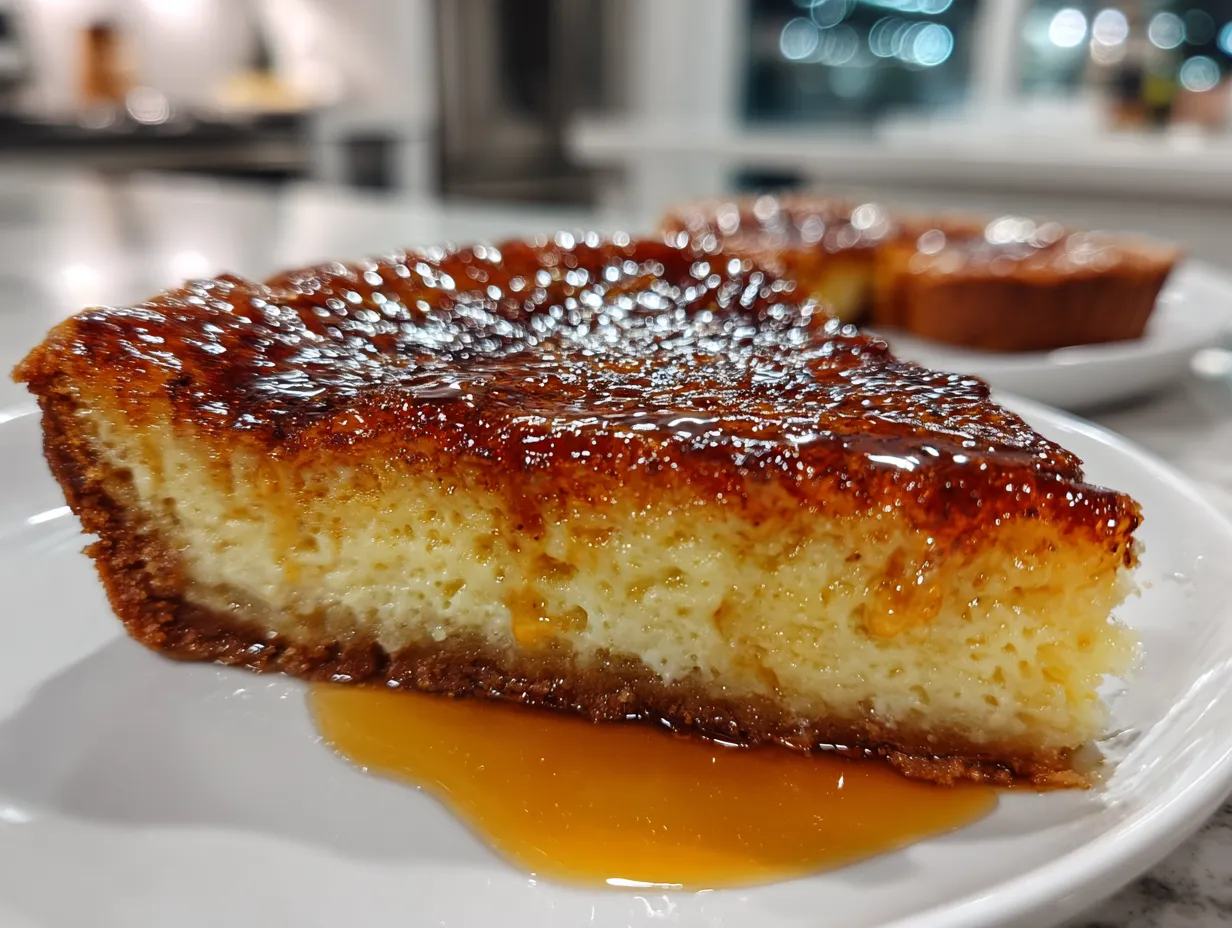
This Burnt Honey Pie boasts a deeply caramelized honey flavor in a creamy custard, encased in a flaky pie crust. It’s a sophisticated and unforgettable dessert that’s surprisingly easy to make.
- Prep Time: 15 minutes
- Cook Time: 50 minutes
- Total Time: 1 hour 5 minutes
- Yield: 8 servings
- Category: Dessert
- Method: Baked
- Cuisine: American
Ingredients
- 1 pre-made pie crust (or homemade, unbaked)
- 1 cup heavy cream
- 1/2 cup whole milk
- 1/2 cup burnt honey (see instructions)
- 3 large eggs
- 1/4 teaspoon salt
- 1/4 teaspoon vanilla extract
Instructions
- Make the Burnt Honey: In a saucepan, heat 1/2 cup honey over medium heat. Cook, swirling occasionally, until the honey darkens to a deep amber color and smells intensely caramelized (about 5-7 minutes). Be careful not to burn it completely. Remove from heat immediately.
- Prepare the Custard: In a medium bowl, whisk together the heavy cream, whole milk, burnt honey, eggs, salt, and vanilla extract until well combined.
- Assemble the Pie: Place the pie crust in a 9-inch pie plate. Pour the honey custard mixture into the crust.
- Bake: Bake in a preheated oven at 350°F (175°C) for 40-50 minutes, or until the filling is set around the edges but still slightly jiggly in the center.
- Cool: Let the pie cool completely on a wire rack before slicing and serving. This allows the custard to fully set.
Notes
Serve chilled or at room temperature. A dollop of whipped cream or a sprinkle of sea salt adds a lovely finishing touch.