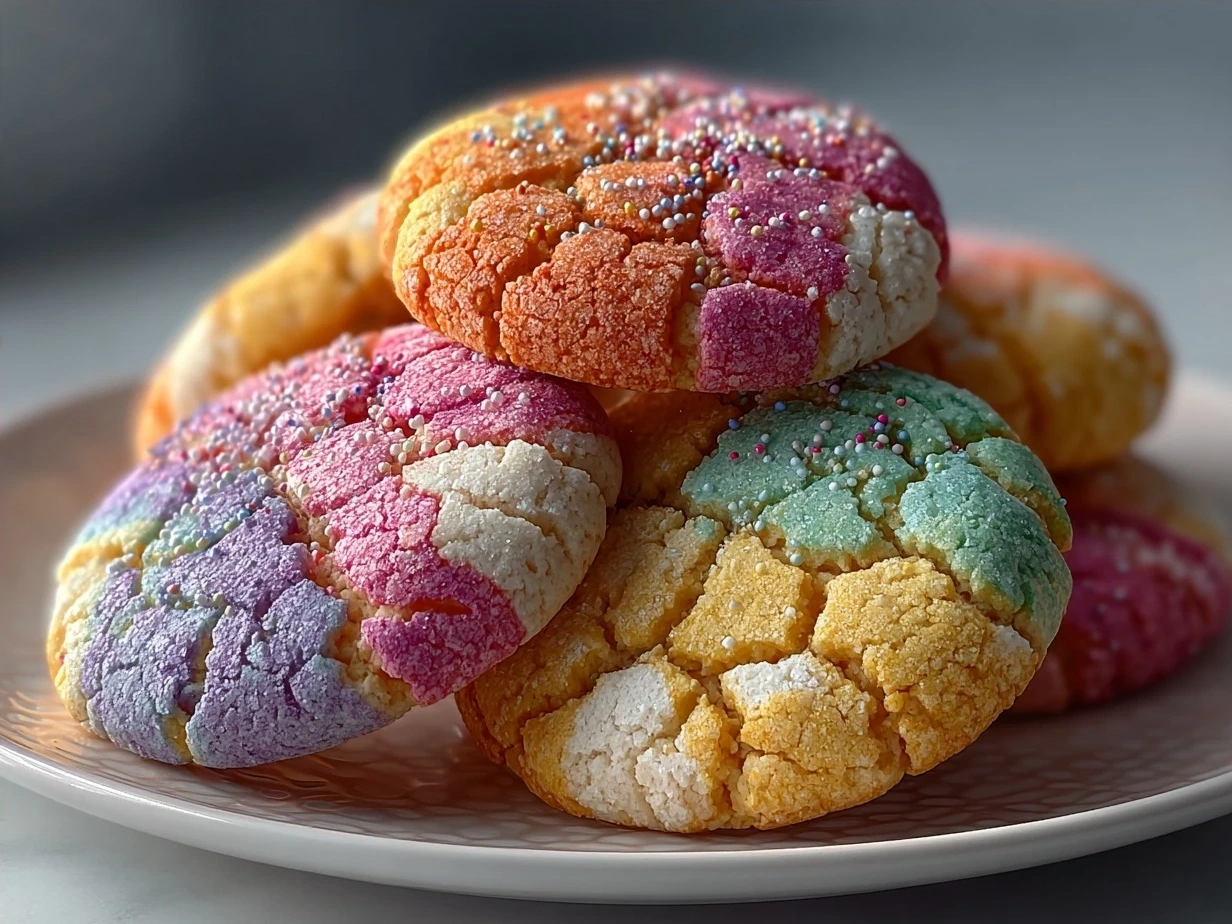
“Oh, Mama, these look like little works of art!” My youngest, Lily, exclaimed, her eyes wide as she peered at a fresh batch of Colorful Marbled Sugar Cookies cooling on the rack. That simple, heartfelt reaction from my daughter was a true flavor victory in our kitchen. It became the moment these beautiful, swirled treats moved from a fun baking experiment to a cherished family tradition.
These Colorful Marbled Sugar Cookies, with their unique patterns and tender bite, quickly became a staple for every celebration and even for our everyday moments needing a touch of joy. I was surprised by how much my family connected with not just the taste, but the visual appeal and the process of making them together. It’s a wonderful feeling when food can spark such genuine delight.
Creating family connections through authentic flavors has always been at the heart of my cooking journey. I believe that meals, whether a comforting weeknight stew or a batch of special cookies, should nourish both body and soul. This recipe for Colorful Marbled Sugar Cookies perfectly embodies that philosophy. It’s a delightful way to spend time in the kitchen and create memories.
There’s something truly satisfying about taking simple ingredients and transforming them into something beautiful and delicious. This is what I love most about baking. It’s a chance to slow down, be present, and create something tangible with love. Our Colorful Marbled Sugar Cookies are a testament to that.
For fellow flavor seekers looking for genuine, flavorful meals and treats that bring loved ones closer, these cookies are a joyful addition to your repertoire. They are a true expression of homemade goodness, designed to inspire confidence in your own kitchen adventures. Get ready to bake some magic!
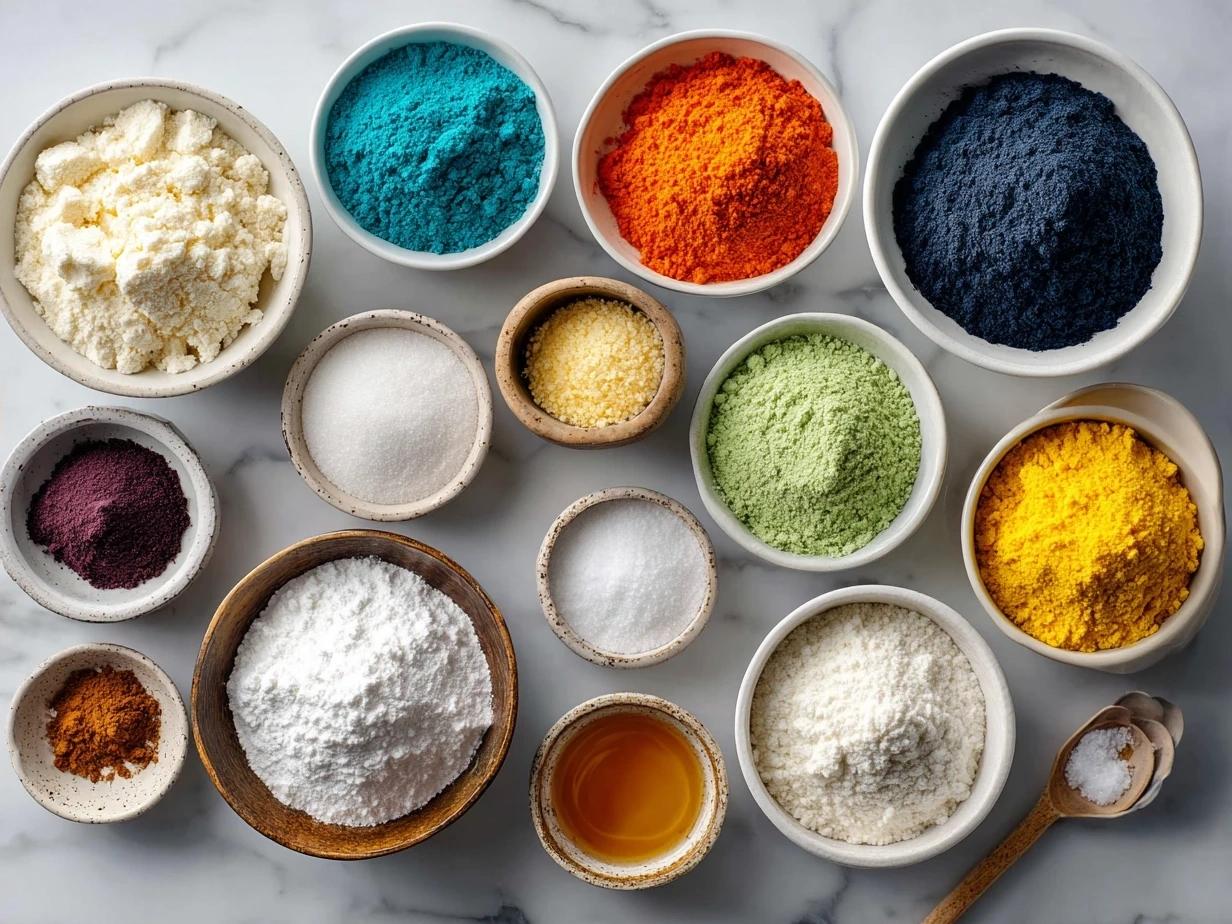
INGREDIENTS You’ll Need
Here’s where we lay the foundation for truly spectacular Colorful Marbled Sugar Cookies. Trust me, this ingredient list focuses on quality over quantity for authentic flavors! Each component plays a vital role in achieving that perfect texture and taste.
You’ll find the freshest ingredients for this Colorful Marbled Sugar Cookies at your local farmers market or a reputable grocery store. Opting for good quality butter and extracts truly makes a difference in the final flavor. This Colorful Marbled Sugar Cookies proves that authentic flavor comes from thoughtful ingredient choices.
For the best flavor in your Colorful Marbled Sugar Cookies, I recommend sourcing unsalted butter. This allows you to control the salt content precisely. Good quality vanilla extract is another spice secret that transforms these cookies from good to unforgettable. My family loves when I add a touch of almond extract too, it really complements the sweet butteriness of these Colorful Marbled Sugar Cookies.
- 2 ½ cups All-Purpose Flour: Spooned and leveled, for a tender crumb. Too much flour makes cookies tough.
- 1 teaspoon Baking Powder: This gives our cookies a slight lift and delicate texture.
- ½ teaspoon Salt: Balances the sweetness and enhances all the flavors. Don’t skip it!
- 1 cup (2 sticks) Unsalted Butter: Softened to room temperature. This is crucial for a smooth dough.
- 1 ½ cups Granulated Sugar: The sweetness foundation for our delicious swirl cookie recipe.
- 1 large Egg: At room temperature, for better emulsification with the butter and sugar.
- 1 teaspoon Vanilla Extract: Use a good quality pure vanilla for the best flavor.
- ½ teaspoon Almond Extract (optional): A secret spice that adds a lovely depth to the flavor profile.
- Gel Food Coloring: Various colors (e.g., red, blue, yellow, green) for that vibrant cookie design. Gel colors give you rich hues without thinning your dough.
- For the Easy Marbled Icing:
- 2 cups Powdered Sugar: Sifted, for a smooth, lump-free icing.
- 2-3 tablespoons Milk (or water): Start with less, add more as needed for desired consistency.
- ¼ teaspoon Vanilla Extract: For a touch of flavor in the icing.
- Gel Food Coloring: Small amounts of your chosen colors.
Ingredient prep wisdom here involves making sure your butter and egg are at room temperature. This simple step creates a much smoother, more cohesive dough that’s easier to work with. It’s a small detail that leads to a big flavor victory in your homemade sugar cookie art.
Let’s Create This Together!
Making these Colorful Marbled Sugar Cookies is truly a kitchen adventure, and I’m here to guide you every step of the way. It’s a process that invites creativity and a little bit of playful experimentation. Here’s where I used to miss a key step with my Colorful Marbled Sugar Cookies – learn from my experience! Getting the dough just right makes all the difference for beautiful marbling.
Prep Your Dry Ingredients: In a medium bowl, whisk together the all-purpose flour, baking powder, and salt. Set this aside for a moment. This ensures all the dry ingredients are evenly distributed, leading to a consistent texture in every bite of your Colorful Marbled Sugar Cookies.
Cream Butter and Sugar: In a large mixing bowl, using an electric mixer, cream together the softened unsalted butter and granulated sugar on medium speed. Beat until the mixture is light and fluffy, usually about 2-3 minutes. This step incorporates air, making your cookies tender. Perfect time to appreciate the aromatic transformation!
Add Egg and Extracts: Beat in the room temperature egg until fully combined. Then, stir in the vanilla extract and the optional almond extract. Scrape down the sides of the bowl to ensure everything is well incorporated. This ensures a rich, flavorful base for your Colorful Marbled Sugar Cookies.
Combine Wet and Dry: Gradually add the dry ingredient mixture to the wet ingredients, mixing on low speed until just combined. Be careful not to overmix, as this can develop the gluten too much and result in tough cookies. Stop mixing as soon as no streaks of flour remain.
Divide and Color the Dough: This is where the magic of the vibrant cookie design begins! Divide your cookie dough into several portions, one for each color of gel food coloring you plan to use. I usually divide mine into 3 or 4 portions. Add a few drops of gel food coloring to each portion and gently knead or mix until the color is evenly distributed. Don’t be surprised if your Colorful Marbled Sugar Cookies dough develops beautiful, rich hues quickly with gel colors. For more vibrant colors, you might want to explore tips for Decorating with colored icing for cookies.
Form the Marbled Dough: Take small pieces of each colored dough and randomly press them together, forming a larger, multi-colored ball. Gently twist and fold the dough a few times, but avoid overworking it, or the colors will blend too much and you’ll lose the distinct swirl. The goal is a gentle marble effect, not a single color. This is a family-tested technique for truly stunning decorated sugar biscuits.
Chill the Dough: Flatten the marbled dough ball into a disc, wrap it tightly in plastic wrap, and refrigerate for at least 30 minutes, or up to 1 hour. Chilling the dough helps prevent the cookies from spreading too much in the oven, maintaining their shape and vibrant cookie design. In my kitchen, this flavorful Colorful Marbled Sugar Cookies dough typically takes about 45 minutes to firm up perfectly.
Preheat Oven and Prep Baking Sheets: While the dough chills, preheat your oven to 375°F (190°C). Line baking sheets with parchment paper or silicone baking mats. This prevents sticking and ensures even baking for your Colorful Marbled Sugar Cookies.
Roll and Cut Cookies: On a lightly floured surface, roll out the chilled marbled dough to about ¼-inch thickness. Use your favorite cookie cutters to cut out shapes. Gather the scraps, gently re-marble if needed, and re-roll once or twice. Place the cut-out cookies about 1 inch apart on your prepared baking sheets.
Bake to Perfection: Bake for 8-10 minutes, or until the edges are lightly golden and the centers are set. The exact time will depend on your oven and the size of your cookies. While your Colorful Marbled Sugar Cookies are developing these flavors, take a moment to appreciate creating something special for your family! These soft marbled sugar cookies with royal icing can be inspired by this Soft Marbled Sugar Cookies with Royal Icing: Recipe w/ Video.
Cool Completely: Let the cookies cool on the baking sheets for a few minutes before transferring them to a wire rack to cool completely. This prevents them from breaking and ensures they are ready for the easy marbled icing.
Prepare Easy Marbled Icing: In a small bowl, whisk together the sifted powdered sugar, 2 tablespoons of milk (or water), and vanilla extract until smooth. Add more milk, ½ teaspoon at a time, until you reach a pourable but not too thin consistency. Divide the icing into small bowls and color each portion with a different gel food coloring.
Ice Your Colorful Marbled Sugar Cookies: Drizzle spoonfuls of different colored icing onto the cooled cookies. Use a toothpick or skewer to gently swirl the colors together, creating beautiful marbled patterns. Let the icing set completely before storing. This homemade sugar cookie art is so fun to create! For more inspiration on a vibrant cookie design, check out these Tie-dye sugar cookies with marble royal icing.
How We Love to Enjoy This!
These Colorful Marbled Sugar Cookies are a joy to behold and a delight to eat, making them a true flavor victory in our home. The family gathers quickly when this aromatic Colorful Marbled Sugar Cookies appears with a fresh pot of tea or a cold glass of milk. They are perfect for sharing with neighbors, bringing to a school potluck, or simply enjoying during a quiet afternoon.
My kids love these as an after-school treat, especially when they’ve helped with the decorating. They are also fantastic for birthday parties or holiday gatherings, adding a touch of festive cheer with their vibrant cookie design. The beauty of these decorated sugar biscuits is that they are impressive without being overly complicated.
For a complementary dish, we often pair these Colorful Marbled Sugar Cookies with a simple fruit salad. The fresh, bright flavors of berries and melon provide a lovely contrast to the sweet, buttery cookies. Sometimes, if it’s a special occasion, we’ll serve them alongside a scoop of homemade vanilla bean ice cream. The combination is simply irresistible.
These Colorful Marbled Sugar Cookies are perfect for those evenings when we want something truly satisfying! They also make wonderful edible gifts, beautifully arranged in a clear cellophane bag with a ribbon. The presentation ideas are endless, but the authentic flavors truly shine through no matter how you serve them.
Creative leftover transformations? While these cookies rarely last long enough to be “leftovers,” any stragglers can be crumbled over ice cream or into a milkshake for an extra treat. For a seasonal variation, I sometimes use fall colors like orange, brown, and yellow for a harvest theme, or pastels for spring. Guest reactions to our delicious Colorful Marbled Sugar Cookies are always positive; they’re often surprised by how easy they are to make! If your family loves these authentic flavors, they’ll appreciate our other cookie recipes like these sugar cookies.
FAQs: Your Questions Answered
“Savannah, does this Colorful Marbled Sugar Cookies really satisfy hearty appetites?” This is a question I get often, and my answer is always a resounding yes! While they are cookies, the homemade goodness and satisfying sweetness make them a truly fulfilling treat. They are substantial enough to feel like a proper indulgence.
Q1: Can I prepare the Colorful Marbled Sugar Cookies dough ahead of time?
Absolutely! This is one of my favorite flavor-building wisdom tips for busy weeks. You can prepare the dough, color it, and marble it. Then, wrap it tightly in plastic wrap and refrigerate for up to 3 days. You can even freeze it for up to 3 months. Just thaw in the refrigerator overnight before rolling and baking. It makes getting these Colorful Marbled Sugar Cookies on the table so much easier!
Q2: What if someone in my family prefers milder flavors in their Colorful Marbled Sugar Cookies?
That’s totally fine! For milder preferences, you can certainly reduce the amount of almond extract or omit it entirely. The vanilla extract provides a lovely, universally loved base flavor. You can also opt for just one or two colors in your vibrant cookie design if less visual “busyness” is preferred. Family feedback has shown me that simplicity can sometimes be just as effective.
Q3: My cookies spread too much. What went wrong with my swirl cookie recipe?
This is a common concern! Usually, spreading comes down to a few things. First, ensure your butter isn’t too soft; it should be softened but not melted. Second, always chill your dough for the recommended time (or even longer if your kitchen is warm). Third, make sure you’re not over-flouring your surface when rolling, as adding too much extra flour can also impact spreading. For more genuine cooking ideas for family meals, explore tips for Halloween Crinkle Cookies, which also benefit from chilling.
Q4: Can I use liquid food coloring instead of gel food coloring for the Colorful Marbled Sugar Cookies?
While you can use liquid food coloring, I don’t recommend it for this particular homemade sugar cookie art. Liquid colors can add too much moisture to your dough, making it sticky and harder to handle. Gel food colorings are much more concentrated, giving you vibrant cookie design without altering the dough consistency.
Q5: How do I get those perfect, distinct marble patterns in my decorated sugar biscuits?
The key is gentle handling! When you combine the colored dough portions, twist and fold them just a few times. Don’t knead them extensively, or the colors will fully blend. Think of it as creating swirls, not mixing. When you roll it out, also be gentle. My personal Colorful Marbled Sugar Cookies experiences showed me less is truly more here.
Q6: What’s the best way to store these Colorful Marbled Sugar Cookies?
Once the easy marbled icing is completely set, store the cookies in an airtight container at room temperature for up to 5-7 days. If you want to keep them longer, they freeze beautifully for up to 2-3 months. Just layer them with parchment paper in an airtight container to prevent sticking.
Q7: Can I make these Colorful Marbled Sugar Cookies gluten-free?
I haven’t personally tested this specific recipe with gluten-free flour, but many home cooks have success substituting a 1:1 gluten-free baking flour blend. Just know that the texture might be slightly different. If you experiment, use a blend that contains xanthan gum. You might also find inspiration for adapting recipes by looking at how other bakes, like Zucchini Chocolate Chip Cookies, handle flour variations.
Final Kitchen Wisdom
Making these Colorful Marbled Sugar Cookies truly supports my family’s authentic meal goals by offering a touch of homemade magic that brings us together. It’s about more than just a sweet treat; it’s about the joy of creation, the shared laughter in the kitchen, and the satisfaction of a beautifully crafted cookie. These Colorful Marbled Sugar Cookies are a testament to how simple ingredients can yield truly special results.
My Colorful Marbled Sugar Cookies Flavor Secrets:
- The almond extract is a game-changer: It adds a subtle depth that makes these cookies irresistible.
- Don’t skip the chilling time: This is vital for maintaining shape and achieving that perfect texture.
- Embrace imperfect marbling: Each cookie will be unique, which is part of their charm!
We have a few family-tested Colorful Marbled Sugar Cookies variations. My son, Leo, prefers bright primary colors for his vibrant cookie design, while Lily loves soft pastels. For a truly festive touch, I sometimes add a sprinkle of edible glitter to the wet easy marbled icing. Another variation is using warm spices like cinnamon and nutmeg in the dough for a cozy, autumnal twist, creating delightful decorated sugar biscuits.
I encourage you, fellow flavor seekers, to make this swirl cookie recipe your signature version. Play with colors, try different extracts, and let your kitchen creativity shine. Share these beautiful cookies with your loved ones and watch their faces light up. My hope for your family’s cooking success is that these Colorful Marbled Sugar Cookies bring as much joy and connection to your home as they do to mine. Happy baking!

\n \n Print
Colorful Marbled Sugar Cookies
Create a stunning visual feast with these vibrant Colorful Marbled Sugar Cookies! Perfect for parties or a fun baking project, these cookies are as delightful to look at as they are to eat.
- Prep Time: 30 minutes
- Cook Time: 10 minutes
- Total Time: 70 minutes
- Yield: 24 cookies
- Category: Dessert
- Method: Baked
- Cuisine: American
Ingredients
- 2 ½ cups all-purpose flour
- 1 teaspoon baking powder
- ½ teaspoon salt
- 1 cup (2 sticks) unsalted butter, softened
- 1 ½ cups granulated sugar
- 2 large eggs
- 1 teaspoon vanilla extract
- Gel food coloring in various colors (e.g., red, blue, yellow, green)
Instructions
- In a medium bowl, whisk together the flour, baking powder, and salt. Set aside.
- In a large bowl, cream together the softened butter and granulated sugar with an electric mixer until light and fluffy.
- Beat in the eggs one at a time, then stir in the vanilla extract.
- Gradually add the dry ingredients to the wet ingredients, mixing on low speed until just combined and a soft dough forms. Do not overmix.
- Divide the dough into 3-4 equal portions (or as many colors as you plan to use). Add a few drops of different gel food coloring to each portion and knead gently until the color is evenly distributed.
- Roll each colored dough portion into a log. Then, twist the colored logs together and gently knead a few times to create a marbled effect without fully blending the colors.
- Divide the marbled dough into two discs, wrap each tightly in plastic wrap, and refrigerate for at least 30 minutes, or up to 2 hours, to chill.
- Preheat oven to 375°F (190°C). Line baking sheets with parchment paper.
- On a lightly floured surface, roll out one disc of chilled dough to about ¼-inch thickness. Use cookie cutters to cut out desired shapes. Reroll scraps as needed.
- Place cookies about 1 inch apart on the prepared baking sheets.
- Bake for 8-10 minutes, or until the edges are lightly golden.
- Let cookies cool on the baking sheets for 5 minutes before transferring them to a wire rack to cool completely.
Notes
For extra sparkle, sprinkle cookies with sanding sugar before baking. Store in an airtight container at room temperature for up to 5 days.