Here we go, fellow flavor seekers! Let’s talk about Homemade Boston Cream Pie. This dessert is more than just a sweet treat; it’s a hug on a plate, a taste of nostalgia, and a guaranteed way to bring smiles to your family’s faces. It’s been a journey perfecting this recipe, learning from a few kitchen mishaps along the way, but oh, it’s been worth it!
I remember the first time I attempted to make a Homemade Boston Cream Pie. It was for a family gathering, and I wanted to impress everyone. Well, the cake layers were a bit uneven, the vanilla cream filling was a tad runny, and the chocolate ganache was…let’s just say it wasn’t as smooth as I envisioned. But you know what? Everyone still devoured it! That’s the magic of Homemade Boston Cream Pie: even when it’s not perfect, it’s still utterly delicious and made with love.
Over time, I tweaked and refined my approach, learning little tricks and secrets that transformed my Homemade Boston Cream Pie from a hopeful attempt into a family favorite. One of my greatest sources of inspiration was The Kitchn Boston Cream Pie Recipe Review – sometimes, it is helpful to see how others iterate the same recipe. And trust me, the joy of seeing my family’s eyes light up with each bite makes all the effort worthwhile.
This Homemade Boston Cream Pie is a celebration of simple, wholesome ingredients coming together to create something truly special. It’s about the warmth of vanilla, the richness of chocolate, and the soft, comforting texture of a well-made cake. It’s about creating a shared moment of joy and connection with the people you love most. For another chocolatey delight, check out my Halloween Swirl Oreo Cream Cheese Brownies.
If you’re looking to create a little magic in your kitchen and bring your family closer through the joy of baking, then you’re in the right place. Let’s get started on this delicious adventure together! This Homemade Boston Cream Pie creates a family connection through those authentic flavors we all crave. I’m thrilled to share my cooking journey with you and help you create unforgettable moments with your loved ones.
INGREDIENTS You’ll Need:
- For the Cake:
- 1 1/2 cups all-purpose flour
- 1 1/2 teaspoons baking powder
- 1/4 teaspoon salt
- 1/2 cup (1 stick) unsalted butter, softened
- 1 cup granulated sugar
- 2 large eggs
- 1 teaspoon vanilla extract
- 3/4 cup milk
- For the Vanilla Cream Filling:
- 2 cups milk
- 3/4 cup granulated sugar
- 1/4 cup cornstarch
- 1/4 teaspoon salt
- 2 large eggs, lightly beaten
- 2 tablespoons unsalted butter
- 2 teaspoons vanilla extract
- For the Chocolate Ganache:
- 6 ounces semi-sweet chocolate chips
- 3/4 cup heavy cream
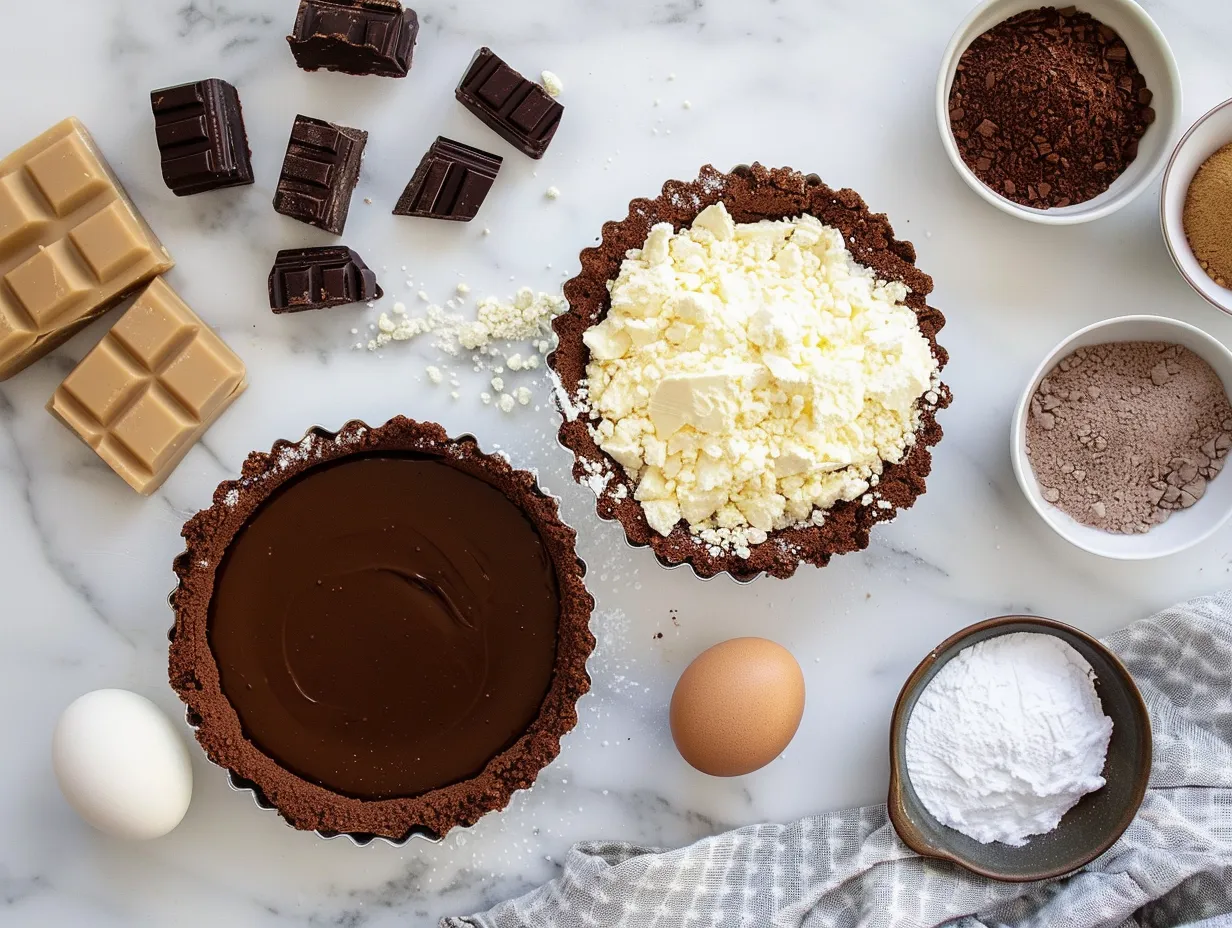
For the best flavor in your Homemade Boston Cream Pie, I recommend sourcing high-quality vanilla extract. It makes all the difference in the vanilla cream filling! You’ll find the freshest ingredients for this Homemade Boston Cream Pie at your local farmer’s market or a well-stocked grocery store. Look for butter that’s creamy and pale yellow – that’s a sign of good quality.
This Homemade Boston Cream Pie proves that authentic flavor comes from thoughtful ingredient choices. When you use good quality ingredients, you can really taste the difference in the final product. Trust me, this Homemade Boston Cream Pie ingredient list focuses on quality over quantity for authentic flavors!
Here’s a Homemade Boston Cream Pie flavor secret that transformed our family dinners: a tiny pinch of sea salt in the chocolate ganache! It really helps to balance the sweetness and bring out the richness of the chocolate. My family loves when I add this extra touch to our Homemade Boston Cream Pie – it’s become our little signature. You might also want to explore my Creamy Reuben Soup for another hearty family favorite.
Let’s Create This Together!
- Preheat your oven to 350°F (175°C). Grease and flour two 9-inch round cake pans. This step is crucial to prevent the cake from sticking.
- In a medium bowl, whisk together the flour, baking powder, and salt. Set aside. This ensures that your dry ingredients are evenly distributed for a consistent cake texture.
- In a large bowl, cream together the softened butter and sugar until light and fluffy. This is where your Homemade Boston Cream Pie gets its tender crumb.
- Beat in the eggs one at a time, then stir in the vanilla extract. Make sure each egg is fully incorporated before adding the next.
- Gradually add the dry ingredients to the wet ingredients, alternating with the milk, beginning and ending with the dry ingredients. Mix until just combined. Be careful not to overmix, as this can result in a tough cake.
- Pour the batter evenly into the prepared cake pans.
- Bake for 25-30 minutes, or until a wooden skewer inserted into the center comes out clean. Perfect time to appreciate the aromatic transformation!
- Let the cakes cool in the pans for 10 minutes before inverting them onto a wire rack to cool completely. While your Homemade Boston Cream Pie is baking, it is the perfect time to prepare the vanilla cream filling!
- While the cakes are cooling, prepare the vanilla cream filling. In a medium saucepan, whisk together the milk, sugar, cornstarch, and salt.
- In a separate small bowl, lightly beat the eggs.
- Gradually whisk about 1/2 cup of the hot milk mixture into the eggs to temper them, then pour the egg mixture back into the saucepan. This prevents the eggs from scrambling and ensures a smooth, creamy filling.
- Cook over medium heat, stirring constantly, until the mixture comes to a boil and thickens. Your filling should be smooth and glossy.
- Remove from heat and stir in the butter and vanilla extract.
- Pour the vanilla cream filling into a bowl, cover with plastic wrap (pressing it directly onto the surface to prevent a skin from forming), and refrigerate until completely cooled.
- Once the cakes and filling are cooled, prepare the chocolate ganache. Place the chocolate chips in a heatproof bowl.
- In a small saucepan, heat the heavy cream over medium heat until it just comes to a simmer.
- Pour the hot cream over the chocolate chips and let it sit for a minute to soften the chocolate.
- Gently stir until the chocolate is completely melted and the ganache is smooth.
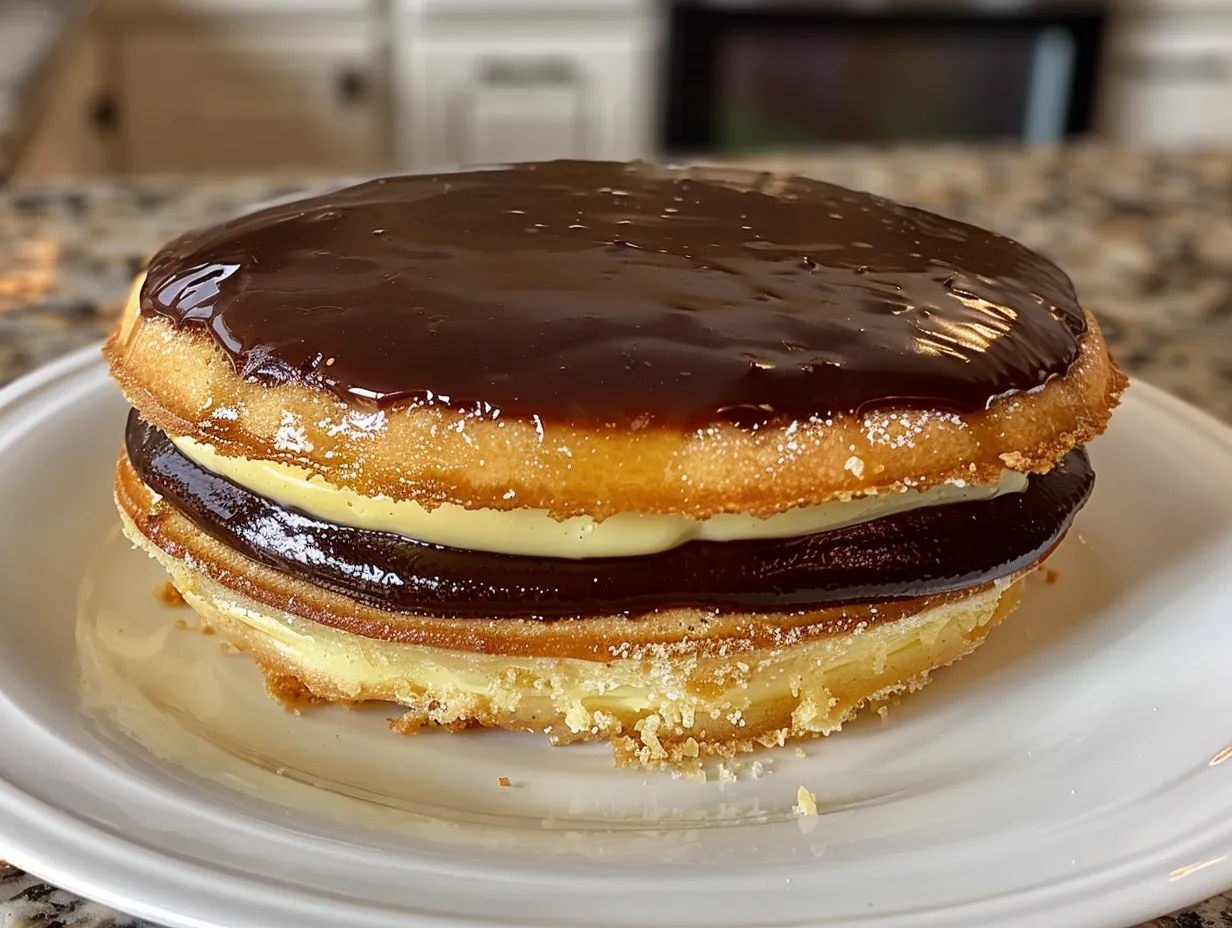
- To assemble the pie, place one cake layer on a serving plate.
- Spread the vanilla cream filling evenly over the cake layer.
- Top with the second cake layer.
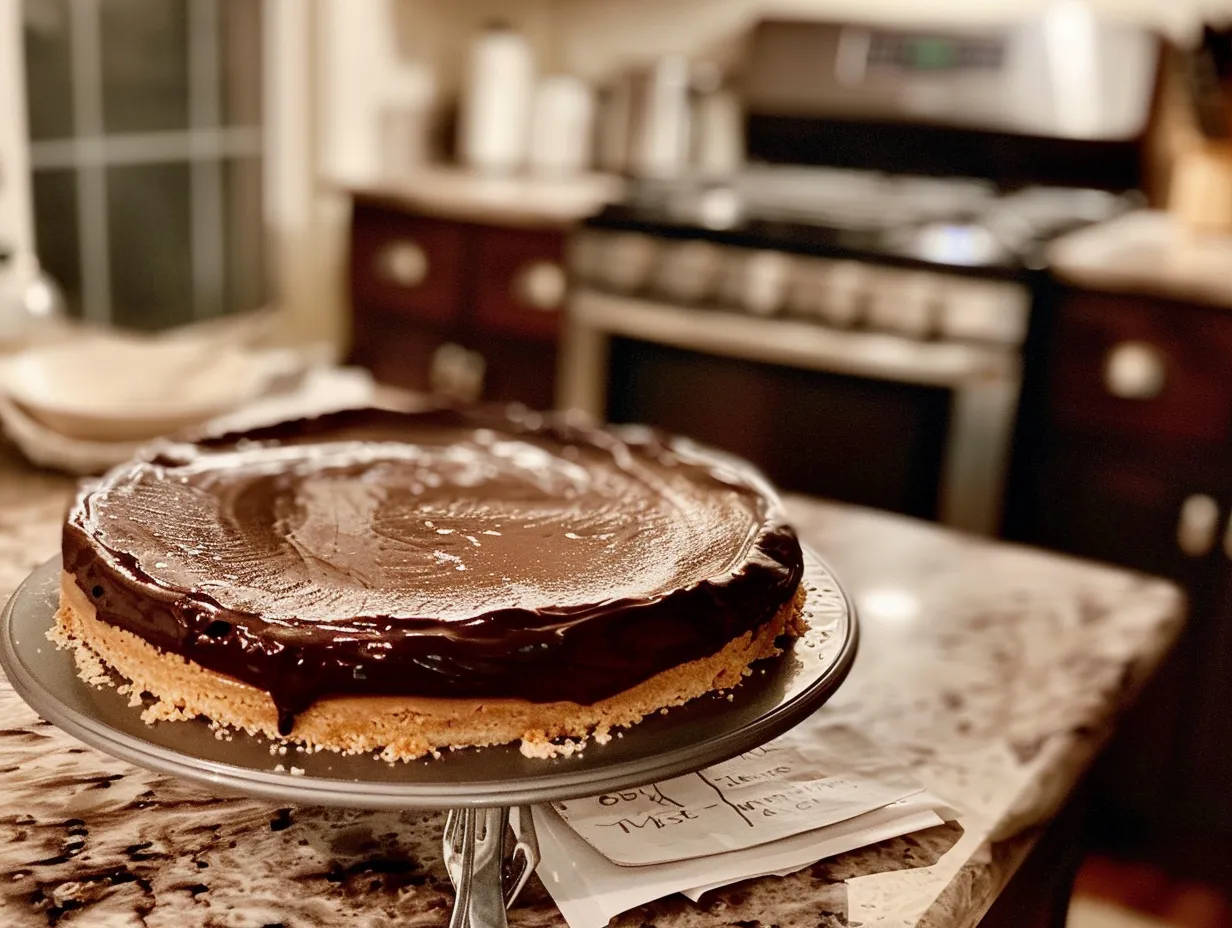
- Pour the chocolate ganache over the top cake layer, allowing it to drip down the sides.
- Refrigerate for at least 30 minutes to allow the ganache to set before serving. Your Homemade Boston Cream Pie should fill the kitchen with amazing aromas by now! Here’s where I used to miss a key step with my Homemade Boston Cream Pie – learn from my experience! Make sure the cake layers are completely cooled before assembling, otherwise the vanilla cream filling will melt and the ganache will slide right off.
While your Homemade Boston Cream Pie is developing these flavors, take a moment to appreciate creating something special for your family! In my kitchen, this flavorful Homemade Boston Cream Pie typically takes about 2 hours from start to finish, including cooling time.
Don’t be surprised if your Homemade Boston Cream Pie develops a slightly uneven ganache layer – that’s part of its homemade charm!
How We Love to Enjoy This!
The family gathers quickly when this aromatic Homemade Boston Cream Pie appears with a scoop of vanilla ice cream. My kids love it when I add a sprinkle of mini chocolate chips on top of the ganache for extra chocolatey goodness. It’s the perfect finishing touch!
This Homemade Boston Cream Pie is perfect for those evenings when we want something truly satisfying! We often enjoy it after a hearty family dinner, like my Loaded Cream Cheese Halloween Brownies, creating a perfect balance of savory and sweet. And for another interesting take, let’s discuss, Why is Boston cream pie called a pie?
For presentation, I like to slice the Homemade Boston Cream Pie into generous wedges and arrange them artfully on a plate. A dusting of powdered sugar on the plate adds a touch of elegance. If you have any leftover Homemade Boston Cream Pie (which is rare in my house!), you can transform it into a delicious trifle. Simply layer the cake, filling, and ganache in a glass bowl with whipped cream and berries for a stunning and flavorful dessert.
During the summer months, I like to add a layer of fresh berries between the cake layers for a seasonal twist. Strawberries, raspberries, or blueberries all work beautifully with the vanilla cream and chocolate ganache. During the fall, I sometimes add a hint of cinnamon to the vanilla cream filling for a cozy, autumnal flavor. Guests always rave about this delicious Homemade Boston Cream Pie! It’s become a signature dessert that they look forward to at every gathering.
FAQs: Your Questions Answered
- Does this Homemade Boston Cream Pie really satisfy hearty appetites?
Absolutely! This Homemade Boston Cream Pie is rich, decadent, and incredibly satisfying. The combination of the moist cake, creamy filling, and chocolate ganache is sure to please even the heartiest of appetites. My family always asks for seconds!
- What if someone in my family prefers milder flavors in their Homemade Boston Cream Pie?
No problem! You can easily adjust the flavors to suit your family’s preferences. For a milder chocolate flavor, use milk chocolate chips instead of semi-sweet. You can also reduce the amount of sugar in the vanilla cream filling if you prefer a less sweet dessert.
- How can I prepare this Homemade Boston Cream Pie ahead for busy weeks?
You can definitely prepare elements of this Homemade Boston Cream Pie ahead of time. The cake layers can be baked a day or two in advance, wrapped tightly in plastic wrap, and stored at room temperature. The vanilla cream filling can also be made ahead and stored in the refrigerator for up to two days. The chocolate ganache is best made fresh, but it only takes a few minutes to prepare.
- Can I make this Homemade Boston Cream Pie gluten-free?
Yes, you can! Simply substitute the all-purpose flour with a gluten-free flour blend. I recommend using a blend that’s specifically designed for baking, as it will provide the best texture and flavor.
- Is it okay to play around with other flavors in the cream filling of my Homemade Boston Cream Pie?
Definitely. A few drops of almond extract in the vanilla cream or a few tablespoons of peanut butter mixed in the ganache would be interesting. Don’t be afraid to play around with different flavors of your Homemade Boston Cream Pie.
- What’s the best way to store leftover Homemade Boston Cream Pie?
Store any leftover Homemade Boston Cream Pie in an airtight container in the refrigerator. It will stay fresh for up to three days.
- Can I freeze this Homemade Boston Cream Pie?
While you can freeze Homemade Boston Cream Pie, the texture of the cake and filling may change slightly upon thawing. If you do freeze it, wrap it tightly in plastic wrap and then in aluminum foil. Thaw it in the refrigerator overnight before serving.
Final Kitchen Wisdom:
This Homemade Boston Cream Pie is more than just a dessert; it’s a symbol of love, connection, and the joy of sharing good food with the people who matter most. It supports my family’s authentic meal goals by providing a satisfying and delicious treat that’s made with wholesome ingredients and lots of love.
My Homemade Boston Cream Pie Flavor Secrets:
- Use high-quality vanilla extract: It makes a world of difference in the vanilla cream filling.
- Add a pinch of sea salt to the chocolate ganache: It balances the sweetness and enhances the chocolate flavor.
- Don’t overbake the cake layers: Overbaking will result in a dry cake.
Family-Tested Homemade Boston Cream Pie Variations:
- Berry Bliss: Add a layer of fresh berries between the cake layers for a seasonal twist. My daughter loves this version!
- Cinnamon Spice: Add a hint of cinnamon to the vanilla cream filling for a cozy, autumnal flavor. My husband prefers this one.
- Extra Chocolatey: Use dark chocolate for the ganache and add mini chocolate chips on top. My son is a huge fan of this version!
I hope you’ll make this Homemade Boston Cream Pie your own signature version, experimenting with different flavors and variations to create a dessert that your family will love for years to come. I hope for your family’s cooking success! Remember Boston Cream Pie Recipe | The Kitchn, a handy guide to double check as you iterate your own version.
With warm encouragement, go ahead and create this satisfying Homemade Boston Cream Pie. Remember, the most important ingredient is love!
Homemade Boston Cream Pie
Indulge in this classic American dessert: a light and airy sponge cake layered with creamy vanilla custard and topped with rich chocolate ganache. This homemade Boston Cream Pie is surprisingly easy to make and will impress your family and friends.
- Prep Time: 30 minutes
- Cook Time: 35 minutes
- Total Time: 65 minutes
- Yield: 8 servings
- Category: Dessert
- Method: Baked
- Cuisine: American
Ingredients
- For the Cake:
- 1 1/2 cups all-purpose flour
- 1 1/2 teaspoons baking powder
- 1/4 teaspoon salt
- 1/2 cup (1 stick) unsalted butter, softened
- 1 cup granulated sugar
- 2 large eggs
- 1 teaspoon vanilla extract
- 3/4 cup milk
- For the Custard:
- 2 cups milk
- 1/2 cup granulated sugar
- 1/4 cup cornstarch
- 1/4 teaspoon salt
- 4 large egg yolks
- 1 tablespoon unsalted butter
- 1 teaspoon vanilla extract
- For the Chocolate Ganache:
- 4 ounces semi-sweet chocolate, chopped
- 1/2 cup heavy cream
Instructions
- Make the Cake: Preheat oven to 350°F (175°C). Grease and flour a 9-inch round cake pan.
- In a medium bowl, whisk together flour, baking powder, and salt.
- In a large bowl, cream together butter and sugar until light and fluffy. Beat in eggs one at a time, then stir in vanilla.
- Gradually add dry ingredients to wet ingredients, alternating with milk, beginning and ending with dry ingredients. Beat until just combined.
- Pour batter into prepared pan and bake for 30-35 minutes, or until a wooden skewer inserted into the center comes out clean.
- Let cool in pan for 10 minutes before inverting onto a wire rack to cool completely.
- Make the Custard: In a medium saucepan, whisk together milk, sugar, cornstarch, and salt.
- In a separate bowl, whisk together egg yolks. Gradually whisk a small amount of the milk mixture into the egg yolks to temper them.
- Pour egg yolk mixture back into the saucepan. Cook over medium heat, stirring constantly, until the custard thickens and comes to a boil.
- Remove from heat and stir in butter and vanilla.
- Pour custard into a bowl, cover with plastic wrap directly on the surface to prevent a skin from forming, and refrigerate until cooled.
- Make the Ganache: Place chopped chocolate in a heatproof bowl.
- Heat heavy cream in a saucepan over medium heat until simmering.
- Pour hot cream over chocolate and let stand for 1 minute. Stir until smooth.
- Assemble the Pie: Slice the cooled cake horizontally into two layers.
- Place one layer on a serving plate and spread with cooled custard.
- Top with the second layer of cake.
- Pour chocolate ganache over the top of the cake, allowing it to drip down the sides.
- Refrigerate for at least 30 minutes before serving to allow the ganache to set.
Notes
For an extra touch, dust the top of the Boston Cream Pie with powdered sugar before serving. You can also add a tablespoon of rum or bourbon to the custard for a richer flavor.